Pages

Tuesday, April 22, 2014

Girl You Are Fab

Here's a quick and super easy card for those days when you are in a hurry.  I thought some of these journaling tags from the Retro Fresh Designer Journaling Tags would make cardmaking super easy..... and I was right!

I have one more stamped hardwood background leftover from my previous projects and a few red-stamped and die cut star bursts.  So this is just a matter of laying them all out on a pool party card stock and adding some blings.  Tip:  When I stamp images or bakgrounds, I always do more than one, in case I messed up.  If I don't messed up, I'll have extra stamped images for another project or a second card!


I sent this card to my upline, the fabulous Patty Bennett!!  She is truly a wonderful person, inside and out, and I'm blessed to be under her wing.

Thanks for stopping by today.

Cheers!!!

irene


Stampin'Up Products I Used:

Monday, April 14, 2014

Hardwood Cross - Confirmation Cards

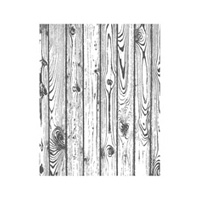
Here's another card using the Hardwood background stamp from Stampin'Up.  I must say there's so much possibility with this background stamp.  When I was working on the hardwood frame card, this idea came to me.  It turned out exactly what I had in mind.


I stamped the Hardwood background stamp on a 5" x 4" baked brown sugar cardstock using chocolate chip ink.  Then I cut the card stock into half inch strips.  Then I draped the crumb cake seam binding ribbon across the cross.  I added the flowers and leaves as an after thought.

I used shimmery white card stock for the card base and the main panel.  The panel was sponged with marina mist and island indigo inks and has nice shimmer in real life.  The sentiment from Stampin'Up's Trust in God was stamped with black StazOn ink.

I thought it turned out really well I wanted to make another one but first, a little research on colors.  I Googled the Confirmation color in Catholicism.  Various websites told me it's red and/or white.  So on to the next card.


The left over strips of card stock from the first card were used to make this cross.  The card base and panel were also shimmery white card stock.  On this card, I dry embossed the panel using Stampin'Up's Framed Tulip Textured Impressions embossing folder.  I don't have a red ribbon that would drape naturally like the first card, so I used the cherry cobbler seam binding ribbon.  Not exactly red but close enough.  The white flowers were too plain so I added the yellow viva pearl pen that I got from Joann's.  Now they look like over easy eggs.  LOL!!  But I still like how the red and white worked really well with the "hardwood" cross.


There they are side by side.  Which one do you like best?

My son's Confirmation is on the 26th and I'm quite pleased with myself that I got his cards done two weeks early.  I'm usually a last minute kinda girl.

Cheers!!!

Irene

Here are some of the supplies I used and you can find them all at my store HERE.
Hardwood                      Trust God Clear-Mount Stamp Set
Hardwood  133032                                            Trust in God Clear-Mount  126702
Crumb Cake 1/2 Inch Seam Binding Ribbon                        Framed Tulips Textured Impressions Embossing Folder Die
Seam Binding Ribbon-Crumb Cake  122322      Framed Tulip Textured Impressions  121809
 Punch Pack
Punch Pack  118309

Tuesday, April 8, 2014

Hardwood Frame - You Make the World a Better Place

Hardwood background stamp, my other favorite stamp from Stampin'Up's 2014 Occasions Mini Catalog!  This card was not what I had in mind when I decided to make a frame using the Hardwood Background stamp.  I love this paper from Fresh Prints Designer Paper Stack, it looks like wall paper when paired with the Hardwood background.  What do you think?  I love what I made so far and then I hit a wall!  I tried different layouts, embellishments, nothing works for me.  So the frame sat on my desk for almost two weeks.

I was playing with another card when these elements fell into place.  I finally came up with a layout I can "live with".  LOL!!!  I love this sentiment from the Starburst Sayings stamp set and the matching framelits dies.  I wanted the sentiment to be in red but not a solid red that's why I cut it up.  I don't remember piecing a sentiment before and doing so here, made all the difference.  I really like how this turned out.

Here is the full card.  I LOVE it.  Sponging the edges of the frame gave it some dimension, pretty neat effect!

Thanks for stopping by today.  To get more details on the supplies used here, click the product links or visit my store HERE.

Cheers!!!

irene


Here's my supplies list:

Starburst Sayings                           Starburst Framelits Dies
Starburst Sayings Item #133182                            Starburst Framelits Dies Item #132967


Hardwood                           Fresh Prints Designer Series Paper Stack
Hardwood   Item#133035                       Fresh Prints Designer Paper Stack  Item#132996

Inks:  Baked Brown Sugar, Real Red
Cardstock:  Baked Brown Sugar, Coastal Cabana, Whisper White
Embellishments:  Baker's Twine, Pearls

Burgundy Wedding Reception Invitations

One of my girlfriends got married on a whim.  A couple of days after the whirlwind wedding she called to say she needs invitations for the reception they are planning.  She had three requirements - burgundy in color, simple but elegant and inexpensive.

These are the three layout samples I made for her.  I used My Digital Studio to design the invitation. She picked the top one which was also my first choice.  These are 4.25" x 5.50" flat cards.  The embossing folder I used is Stampin'Up's Vintage Wallpaper which was retired last year.


Bravo Burgundy is the exact color she wants but it's a retired Stampin'Up color and I didn't have enough card stocks for 80 invitations.  Paper Source to the rescue!  Their burgundy card stock is almost the identical shade.  I printed the invitations on Stampin'Up's Very Vanilla cardstock. 


The most tedious task was scoring the pair of vertical "lines" on both sides of the text.  But the Simply Scored tool made the whole process go smoothly.

There you have it - quick and easy but elegant invitations.  Click the links for more information on the supplies I used.

Now that these are out of the way, I can go back to playing with my stuff.

Cheers!!!


irene